
1013
How to Create Delivery Order (DO)

Click Receipts
Click Create Delivery Order

Select the PO in which you want to create DO from (click the checkbox)
Click Create Delivery Order
.png)
Input Delivery Order No and the Delivery Date, a required field.

Scroll down to input quantity delivering under “To Convert” column (the value here is the quantity you are converting to DO)
Input Notes To Buyer (if required)

Use the scrollbar at the bottom to scroll to the right. Mac users without a mouse may not see a visible scrollbar, but you are still able to scroll to the right.
You will see these columns:
PO Quantity: Qty from the PO issued to supplier
Qty Converted: Qty based on the DO/(s) created by the Supplier
PO Qty Rejected: The difference between all DO issued to buyer and all GR created from DO by buyer
PO Qty Received: Qty buyer created GR on the DO issued by the supplier
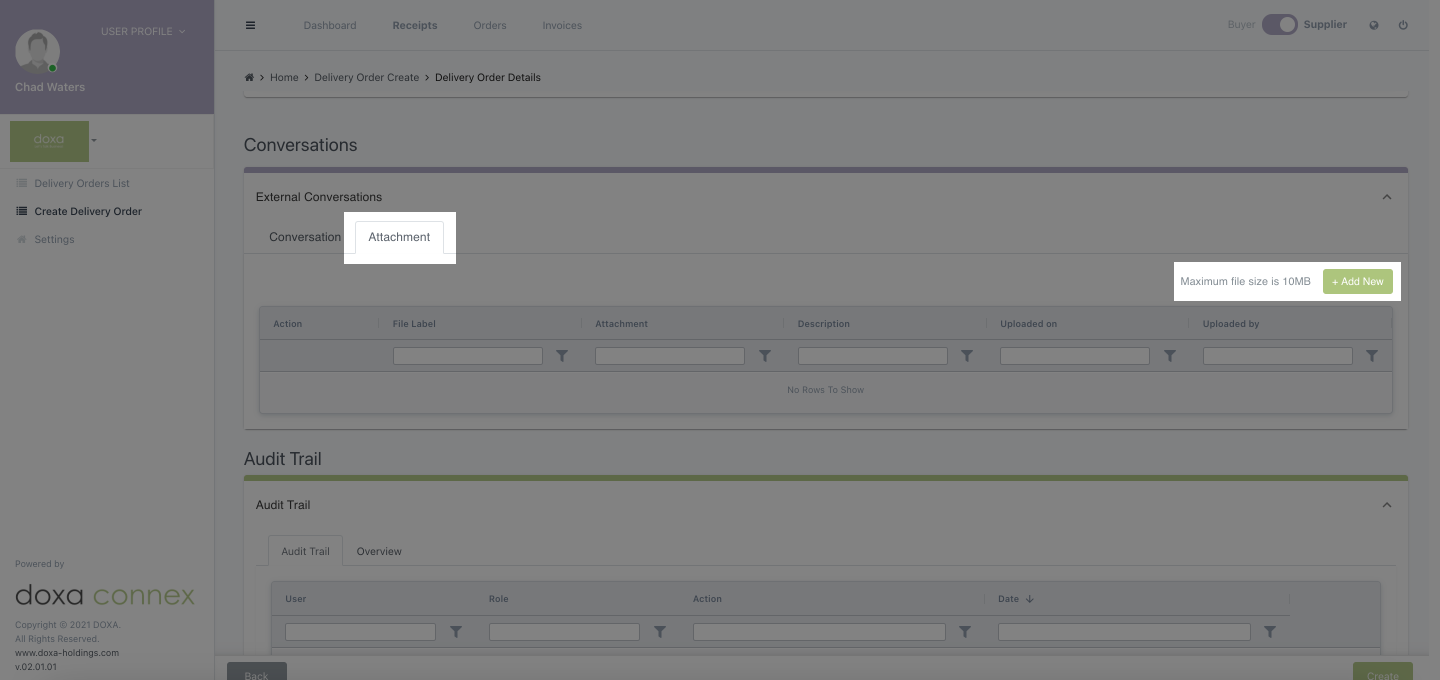
Upload your hardcopy signed DO under the Conversations section.
Click Attachment under Conversations
Click +Add New to create a new conversation row

Click Choose File and select the file from your computer
Input File Label and/or Description (optional)

Click Create to create DO

Once DO is created, there will be a notification to inform the user that this DO has been successfully created. User can click “I Understand” or “Cancel”.
The status of DO will be shown as PENDING ISSUE.
The “PENDING ISSUE” status means that DO is created but not yet issued to the buyer. This DO is now pending supplier to issue to buyer.
